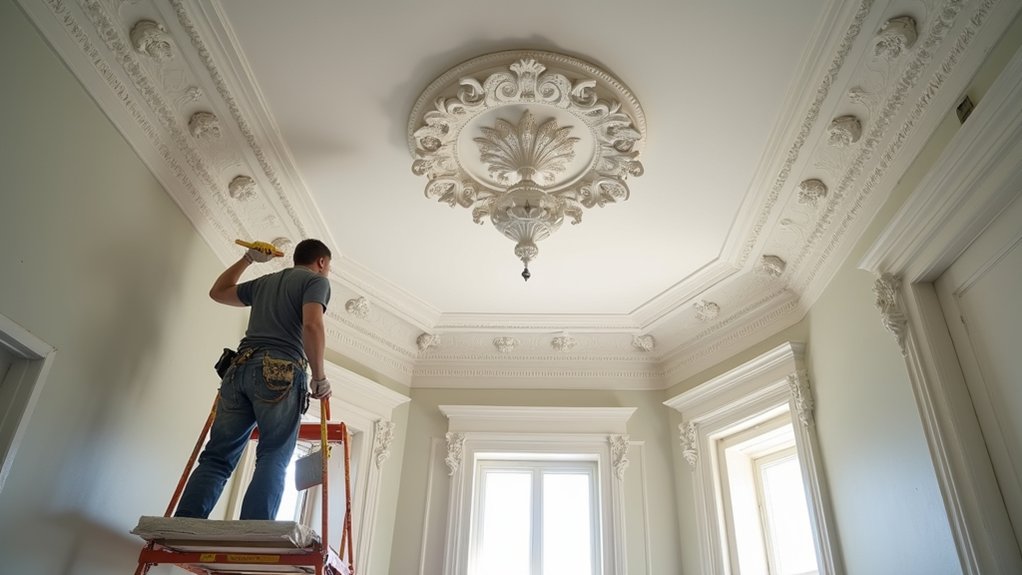

Like the old craftsmen who hid precision in plain sight, you’ll get the best ROI by starting with a hard look at what’s failing and why. You check for movement, moisture, and hairline cracks before you spend on filler or new casts. You stabilize loose sections, match materials, and only recreate missing detail when it’s unavoidable. Do it in the right order and your repairs disappear; skip one step and costs climb—so what do you tackle first?
Key Takeaways
- Inspect with a torch and straightedge for cracks, sagging, missing detail, hollow sounds, staining, or bubbling paint indicating moisture or delamination.
- Trace damage causes (settlement, leaks, thermal movement, rewiring) and fix them first to prevent recurring cracks and failed repairs.
- Match repair materials to existing plaster; remove loose paint and dust, lightly dampen porous areas, and use compatible bonding adhesive.
- Repair cracks by chasing a shallow V, filling with setting plaster, feathering edges; cut back to sound material and support loose sections until cured.
- Replicate missing ornament by making a silicone mold from intact profiles, casting with fine plaster, then prime, sand lightly, and repaint to match sheen.
Inspect Cornices and Ceiling Roses (and the Cause)
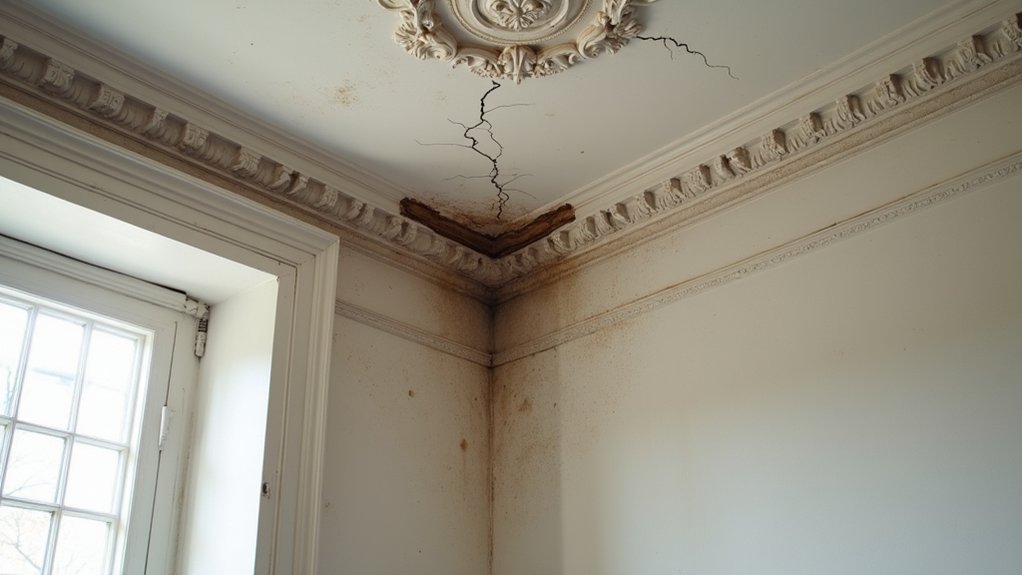
Before you spend money on repairs, inspect your cornices and ceiling roses closely to pinpoint what’s actually failing. Use a bright torch and a straightedge to spot hairline cracks, sagging runs, missing detail, or shadow gaps at joints.
Press gently: a hollow sound often signals delamination from lath or masonry; movement can indicate failed fixings or vibration. Check for staining, bubbling paint, or powdery surfaces that suggest moisture, salts, or previous incompatible coatings.
Trace cracks to their source—settlement, roof leaks, thermal movement, or past rewiring—so you don’t pay twice. Photograph profiles and measure repeats to protect Historical accuracy.
Record what’s sound versus friable to prioritise Material preservation and target only the compromised areas.
Choose Plaster, Filler, and Adhesive for the Repair
You’ll get the best ROI by matching your plaster and base material to the existing substrate, so repairs don’t crack or let go later.
Choose a filler that can hold crisp detail for profiles and ornament, so you’re not paying twice to rework soft edges.
Then use a strong bonding adhesive where it matters—especially on loose sections—so the fix stays put and your labour isn’t wasted.
Match Material To Substrate
Although it’s tempting to grab the quickest tube of “all-purpose” filler, you’ll get a stronger, longer-lasting repair (and avoid paying twice) by matching the plaster, filler, and adhesive to the substrate you’re bonding to—old lime plaster, modern gypsum, timber lath, or painted masonry all behave differently under weight, movement, and moisture.
Prioritise material compatibility: use lime-based repair materials over soft, breathable lime; choose gypsum plaster and gypsum adhesives on sound gypsum; and use flexible construction adhesive only where timber movement demands it.
Don’t rely on glue to overcome weak backgrounds—your ROI comes from substrate preparation. Remove loose paint, chalk, and dust; key glossy surfaces; and lightly dampen porous plaster to control suction.
Prime only when the system specifies it, so your bond cures properly and doesn’t debond later.
Select Fillers For Detail
Once you’ve matched the repair system to the substrate, pick fillers and adhesives that can actually hold crisp profiles without shrinking, tearing, or sanding away the detail you’re paying to preserve.
For fine acanthus leaves and bead runs, use a setting plaster or fine casting plaster for sharp edges and minimal shrinkage; keep ready-mix lightweight fillers for shallow, low-detail dents only.
Choose a fine surface filler for pinholes so you don’t chase defects with repeated coats that burn labour.
Mix small batches and work fast; a stiff mix holds mould lines better than a soupy one.
For Texture matching, test on scrap and tool the surface to mimic the original before it sets.
Finish with a thin skim to aid paint blending and avoid telegraphing repairs.
Use Strong Bonding Adhesives
Because a crisp filler means nothing if it de-bonds later, prioritise a high-grab adhesive that matches the substrate and job conditions before you rebuild any profile.
For sound plaster-to-plaster joins, use a quality casting plaster slurry or proprietary bonding plaster; it keys well and keeps historical accuracy.
Where you’re fixing to painted or dusty masonry, switch to an acrylic bonding agent or PVA primer first, then apply plaster-based adhesive for working time and strength.
For small breaks in decorative motifs, a two-part epoxy or polyurethane grab adhesive saves clamping time and reduces call-backs, but don’t overuse it where breathability matters.
Always de-grease, roughen, and mist-dampen porous edges, then press, pin, and clean squeeze-out fast.
Prep Surfaces and Support Loose Cornice/Rose Sections
Before you spend on materials, you’ll get the best ROI by evaluating the damage and prepping sound, dust-free surfaces that adhesives can actually grip.
Scrape off loose paint and crumbly plaster, then clean and key the area so you don’t pay twice for a failed bond.
If any cornice or rose section moves, you’ll secure and support it safely with temporary props or screws and washers until the repair sets.
Assess Damage And Clean
Although it’s tempting to jump straight into filling and painting, you’ll save time and money by first evaluating the damage and cleaning the area properly.
Start with a close visual check under raking light: mark hairline cracks, missing edges, staining, and any previous repairs that don’t match the profile. Photograph decorative motifs so you can replicate them later and maintain historical authenticity without costly rework.
Next, test the surface: gently tap to identify hollow, delaminated plaster, and note any powdery areas that need consolidation.
Vacuum with a soft brush, then wipe with a barely damp sponge and a mild sugar-soap solution, avoiding saturation.
Remove loose paint flakes, soot, and grease so primers and fillers bond reliably, reducing call-backs and repaint cycles later.
Secure Loose Sections Safely
Where do you start when a cornice run or ceiling rose feels loose? First, plan safe handling: wear goggles, gloves, and a dust mask. Then, isolate the area and support the section with a prop, painter’s tape, or a temporary batten screwed into joists. You’ll prevent a costly fall and avoid full replacement.
Next, prep surfaces: scrape away failing filler, vacuum dust, and lightly abrade glossy paint so adhesive bonds. Mist porous plaster with water, then apply a quality plaster adhesive or setting compound to both faces. Press the moulding back, clamp or prop it, and wipe squeeze-out clean.
Finish with prevention techniques: re-pin with stainless screws or plaster washers where hidden, seal cracks, and control moisture to stop future movement.
Patch Cracks and Replace Missing Cornice Lengths

Once you’ve cleaned and stabilised the area, patching cracks and replacing missing cornice lengths is the step that stops small defects turning into recurring repairs and repainting costs. Chase cracks into a shallow V, vacuum dust, then pre-wet porous plaster so your filler bonds instead of flashing. Use compatible plaster or a quality setting compound for Material matching, and keep profiles crisp for Historical accuracy.
Press filler in firmly, feather edges, and sand only after full set to avoid drag marks.
For missing lengths, cut back to sound cornice with square ends, then dry-fit a matching replacement. Butter both faces with adhesive, pin or prop until cured, and fill joints. Seal repairs before painting so you don’t waste coats hiding suction differences.
Make Molds to Recreate Ceiling Rose Details
When a ceiling rose has chipped petals, softened beads, or missing scrollwork, making a mould lets you recreate the profile fast and cheaply without replacing the whole rose. You’ll save labour, keep original character, and avoid buying a full replacement.
Start by choosing an intact section with crisp detail. Clean it, seal porous plaster with a light coat of shellac, then apply a release agent.
For mold making, press two-part silicone putty over the area, feathering the edges so it keys back in place. Once cured, peel it off and trim the mould neatly.
Mix casting plaster to a creamy consistency, tap out bubbles, and pour into the mould. Pop the cast, test-fit, and repeat until you’ve got consistent detail replication for every missing motif.
Prime and Paint Cornices and Roses to Blend Repairs
Although your repair might feel finished after you’ve patched and recast the missing details, primer and paint are what make the cornice or ceiling rose read as one piece again and protect the new plaster from flashing or staining.
Start by dusting, then wipe with a barely damp sponge and let it dry fully. Spot-prime repairs with a stain-blocking, breathable acrylic primer so the patched areas don’t telegraph through your finish.
Feather the primer 100–150mm past the repair, sand lightly, and prime the whole run if sheen differences show. Use the existing paint type where possible, and match gloss level to preserve historical authenticity.
Two thin topcoats beat one heavy coat, saving paint and keeping profiles crisp. Mask sharp edges, cut in cleanly, and you’ll protect your Decorative craftsmanship while avoiding costly call-backs.
Frequently Asked Questions
Do I Need Listed Building Consent Before Repairing Period Cornices or Ceiling Roses?
You often don’t need listed building consent for like-for-like repairs, but you do if you alter design, materials, or details. Protect ROI by checking early, keeping historical accuracy and material compatibility, and avoiding costly enforcement.
How Do I Safely Remove Lead Paint From Historic Cornices and Roses?
You’ll safely handle Lead paint removal by testing first, then using wet methods, HEPA vacuuming, containment, and PPE; avoid dry sanding. For historic paint preservation, consider encapsulation or pros—reducing rework, fines, and long-term costs.
What’s the Typical Cost Range for Professional Cornice or Ceiling Rose Restoration?
You’ll typically pay $500–$3,000 for a ceiling rose, $2,000–$15,000+ for cornice runs—because “character” isn’t cheap. For Cost estimation, get itemized quotes by Restoration techniques, access, length, moulding complexity, and repairs.
How Long Should Repairs Cure Before Fitting a Chandelier or Ceiling Light?
Wait 7–14 days before hanging a chandelier; allow 28 days for full cure. You’ll avoid cracks and costly rework. Coordinate Chimney restoration and Window framing schedules so access gear doesn’t stress fresh repairs.
Can Decorative Cornices and Ceiling Roses Be Repaired in a Room Still Occupied?
Yes, you can repair them while you’re still occupying the room. You’ll schedule Modern restoration in short, contained sessions, protect furnishings, and prioritize Material preservation, cutting cleanup time, disruption, and costly redecorating.