You’ll often find Georgian wall paneling hiding behind later paint, paper, or “tidy” trim, and it can add real value if you confirm it’s genuine and keep intervention light. Start by checking proportions, moulding profiles, and jointing—look for pegged fixings, hand-planed tool marks, and a settled patina that newer work can’t fake. Paint layers can also date changes and flag risks. Before you touch a scraper, you’ll want to know what you’re actually looking at…
Key Takeaways
- Search entrance halls, stair landings, reception rooms, chimney breasts, and hidden cupboards or under-stair voids for untouched original paneling.
- Confirm authenticity via hand-tool marks and pegged mortise-and-tenon joinery; avoid signs of staples, brads, biscuit joints, or router-uniform profiles.
- Check proportions and symmetry: consistent bay spacing, matching panel ratios, and aligned centerlines; odd widths or mismatched heights often signal later infill.
- Date finishes by paint layers: oil-rich early coats suggest Georgian work, while thick chalky emulsions and roller textures typically indicate later redecorations.
- Preserve by cleaning gently, consolidating sound paint, and spot-priming; avoid full stripping unless layers are failing to prevent moulding and profile loss.
Where to Look for Georgian Wall Paneling
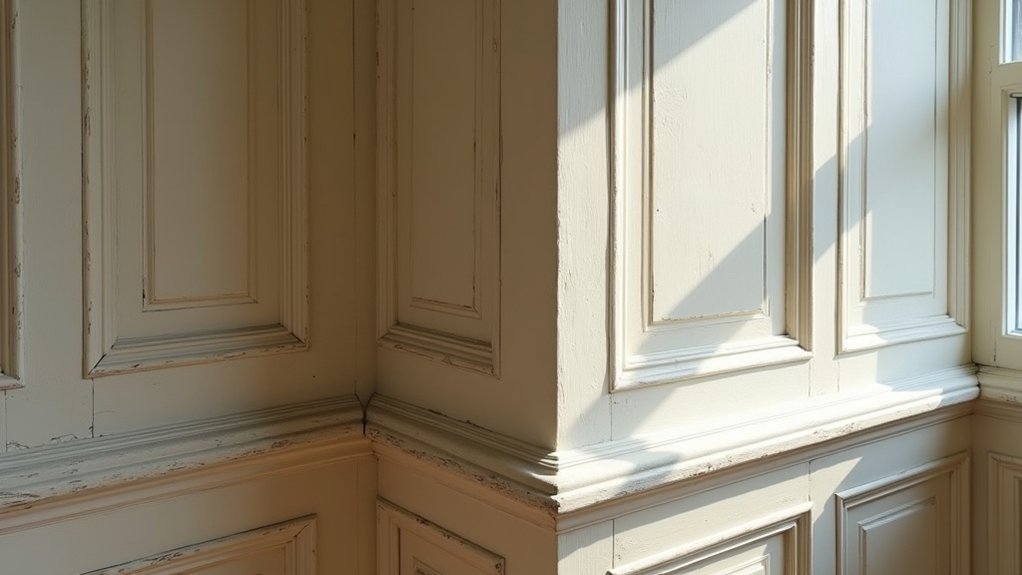
Although Georgian paneling can hide in plain sight, you’ll find it fastest by starting in the parts of a house that owners tend to “tidy up” rather than rip out: entrance halls and stair landings, principal reception rooms (front parlour/drawing room), and the first-floor rooms above them. Check chimney breasts, dado height runs, and the wall sections flanking fireplaces; these zones often retain the strongest Architectural context.
Move next to secondary circulation spaces—back stairs, passages, and landings—where later refits focus on plumbing and electrics, not joinery. In terraces, compare party walls and front elevations; original work clusters where the façade signaled status.
Don’t ignore cupboards and under-stair voids: concealed lengths can verify historical significance and justify careful repair versus replacement costs.
Quick Checklist: Is It Original Georgian Paneling?
You can quickly protect your budget and resale value by checking for period tool marks and authentic joinery before you commit to repairs or restoration.
Next, confirm the timber species and patina match Georgian-age materials and wear, not modern substitutions or artificial ageing.
Finally, measure moulding profiles and proportions against known Georgian patterns, because incorrect runs and oversized details usually signal later work.
Tool Marks And Joinery
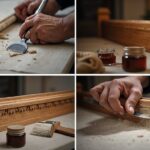
Before you reach for paint stripper or a contractor’s quote, check the tool marks and joinery—because they’re the quickest, highest-ROI indicators of genuine Georgian paneling. Look for faint plane tracks, chisel paring, and irregular saw kerfs that signal Traditional woodworking rather than modern machining.
Run a raking light across rails and stiles; consistent chatter or hand-planed facets often survive even under later paint.
Next, inspect joints where panels meet framing. Georgian work commonly uses mortise-and-tenon frames, pegged joints, and well-fitted haunched tenons at corners; you shouldn’t see staples, brads, or biscuit joinery.
Check for tapered pegs and offset drawbore holes—small details of Historic craftsmanship that are expensive to fake and worth preserving.
Timber Species And Patina
Once the joinery looks right, the timber species and patina will either confirm you’ve got original Georgian paneling or save you from overpaying for a later copy. Start by checking what you’re actually looking at: Georgian work commonly uses slow-grown pine, oak, or deal; later reproductions often lean on faster-grown softwood with wide growth rings and bland figure.
Look for tight rings, hard latewood bands, and consistent grain across adjacent boards, which signals period sourcing and careful selection.
Next, assess patina development. You want depth, not dirt: oxidation darkens exposed faces, while protected backs stay lighter. Edges show rounded wear, not sanded sharpness. Old finish builds in thin, uneven layers with micro-crazing; modern stains look flat and uniform.
Moulding Profiles And Proportions
Because mouldings take the most time to plane and the most skill to proportion, their profiles often give you the fastest ROI-proof read on authenticity. Check the panel frame: Georgian ovolo, cyma, and astragal runs feel crisp yet restrained, with tight fillets and consistent quirk lines. Look for slight tool facets and gentle asymmetry from hand planes, not perfectly uniform router chatter.
Measure proportions: stiles and rails typically read slimmer than Victorian work, with mouldings scaled to room height and fireplace width.
Inspect corners: mitres should meet cleanly, but not laser-perfect.
Watch ornamental motifs: early Georgian stays sparse; later periods add shallow reeding or paterae.
Anchor every judgement in historical context and compare across the room for repeatability.
Spot Georgian Panel Proportions and Layout
Although Georgian paneling looks simple at a glance, you can spot the original stuff by checking whether the proportions follow a disciplined, repeatable grid: tall, narrow “fielded” panels set in bays, with stiles and rails that read as slim and consistent rather than chunky or irregular.
Bring a tape and sketch what you see. Use panel proportion guidelines: compare panel height-to-width, rail widths, and bay spacing across the wall. Originals usually keep ratios steady from corner to corner, even where doors or fireplaces interrupt the run.
Apply layout symmetry principles: centerlines align to openings, matching bays mirror left and right, and top and bottom runs maintain level reveals. If a section breaks the rhythm—odd bay widths, off-center panels, mismatched heights—it’s often later infill.
Consistency protects value and guides repairs.
Read Georgian Molding Profiles and Edges
If you learn to read the molding profiles and edges, you’ll spot original Georgian paneling faster and avoid costly “restoration” that actually devalues the room. Start by scanning for crisp, disciplined curves: ovolo and cavetto profiles should feel restrained, not overly deep or busy.
Look for consistent shadow lines across rails, stiles, and skirtings; mismatched depth often signals later patching or re-cut trim.
Check transitions where panel frames meet dado rails and chimney breasts. Georgian work favors clean arrises with slight easing, not modern rounded-over edges.
At the ceiling line, Decorative cornices usually show balanced projection-to-drop ratios; chunky profiles can indicate Victorian swaps.
Around doorways and alcoves, Ornamental brackets should align with adjacent moldings and repeat predictable radii, not improvised shapes.
Check Tool Marks and Joinery Details
Before you strip paint or commission replicas, inspect the tool marks and joinery—these clues quickly separate original Georgian paneling from later work and keep your budget aimed at preservation, not guesswork.
Look for plane tracks, fine saw kerfs, and slight asymmetry from hand tools; perfectly uniform machining often signals later insertion.
Check joints at stiles, rails, and fielded panels: pegged mortise-and-tenon, tight mitres, and hand-cut dovetails indicate authentic craftsmanship.
Probe discreetly for wedges, trenails, and oak pins rather than modern screws or brads.
Note shrinkage gaps that follow grain direction, not filler lines.
Photograph details and map locations so your joiner can match profiles without over-ordering timber.
These observations guide restoration techniques and prevent expensive, unnecessary replacement.
What Old Paint Layers Can Tell You
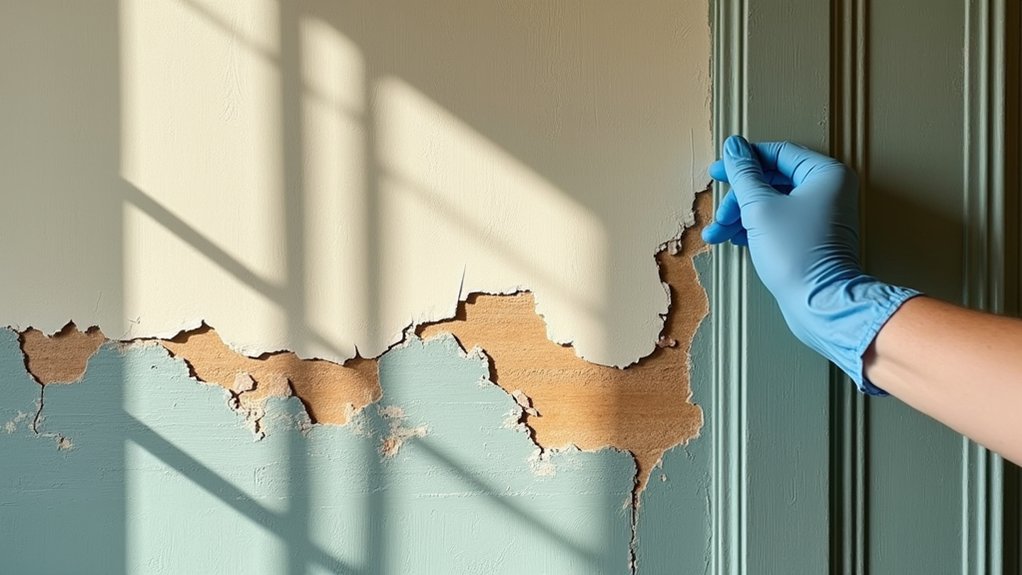
You can treat old paint layers on Georgian wall paneling as a low-cost timeline that validates what’s original and what’s later alteration.
By reading the paint stratigraphy—primer, finish coats, and overpaints—you can date layers, identify period-appropriate finishes, and spot when repairs or reconfigurations happened.
That evidence helps you choose restoration methods that protect value, reduce rework, and keep conservation decisions defensible.
Paint Stratigraphy Clues
Although later redecorations can disguise it, the paint stratigraphy on Georgian wall paneling often preserves a readable timeline of finishes that directly affects what you should restore, what you should leave, and what’ll cost you money to redo.
You can spot value fast by reading where layers change: sharp breaks at moulding edges suggest earlier crisp lines; smeared ridges flag heavy overpainting that’ll hide profiles and force extra stripping.
Look for Historic color palettes peeking in protected recesses; they often signal periods worth conserving rather than chasing a “new” scheme.
Compare paint application techniques: thin, well-bound coats usually clean up; thick, chalky layers tend to fail and contaminate later work.
You’ll save money by sampling first, then targeting only unstable layers for removal.
Dating Layers And Finishes
Paint stratigraphy does more than show where layers changed; it can date the work and pinpoint which finishes belong to the original Georgian fit-out versus later “tidying up.” Start by treating each distinct coat as a timestamp: early oil-rich primers and thin, tightly bound topcoats usually indicate 18th‑century or early 19th‑century campaigns, while thick, chalky emulsions and roller texture tend to signal post‑war redecorations that add removal cost without adding heritage value.
You’ll get better ROI if you map layers room by room, then sample discreetly at edges, moulding quirks, and nail holes to catch earlier schemes. Use Historical context to decide what’s worth saving: original graining, scumble, or lead-white grounds often justify careful retention.
Apply Preservation techniques—gentle solvent gels, controlled scraping, and consolidation—to stabilize sound early coats and avoid expensive, unnecessary full-strip work.
Clean, Repair, and Repaint Without Stripping
Before any scraper touches Georgian wall paneling, a careful clean‑repair‑repaint approach often delivers the best ROI by preserving crisp moulding lines and avoiding the time, mess, and profile loss that come with stripping.
Start with a dry vacuum and soft brush, then wipe with a mild sugar‑soap solution and clean water; keep moisture off joints. Spot‑degrease hand‑height areas so primer bonds.
Consolidate friable paint with a suitable stabiliser, then feather sand only where needed. Fill dents with fine surface filler; use two‑part epoxy for splits, and re‑pin loose sections before caulking gaps.
Prime stains and bare spots, then apply two thin coats of durable, breathable finish. These Historical restoration preservation techniques protect value and speed redecoration while minimising risk.
Frequently Asked Questions
Do I Need Listed-Building Consent to Alter Georgian Wall Paneling?
Yes—you’ll likely need listed-building consent if you alter Georgian wall paneling. It carries historical significance, and unauthorized changes risk fines and devalue the asset. Use preservation techniques, document scope, and consult conservation officers early.
How Can I Date Georgian Paneling Using Dendrochronology or Paint Analysis?
Picture you interrogating your paneling like a tax inspector: sample discreetly. Use Dendrochronology techniques on core samples to match ring chronologies; apply Paint analysis methods to stratigraphy for date ranges—faster, defensible, better ROI.
What Does Original Georgian Paneling Typically Add to Property Value?
Original Georgian paneling typically boosts your property value 5–15%, sometimes more in prime markets, because it signals Historical significance and Architectural authenticity. You’ll attract heritage-focused buyers, reduce negotiation friction, and support stronger valuations.
How Do I Insure and Document Georgian Paneling for Restoration Projects?
Photograph every panel, log dimensions, joinery, and condition, then commission a conservator’s report and schedule it on your policy for historical authenticity. Example: you tag each section, apply preservation techniques, and claim verified restoration costs.
Can I Install Modern Wiring Behind Georgian Paneling Without Damaging It?
Yes—you can, if you route cables through existing voids or shallow chases and keep fixings minimal. Use Electrical concealment strategies and add Wall reinforcement only where necessary; hire a conservation electrician to protect resale value.